To configure approval routes, we will guide you through the minimum required approval steps and permissions, as well as how to set up notification emails for approvals and rejections.
As shown in the diagram below, we will connect the boxes with arrows to illustrate what actions users with permissions should take at each step and where the process transitions next.
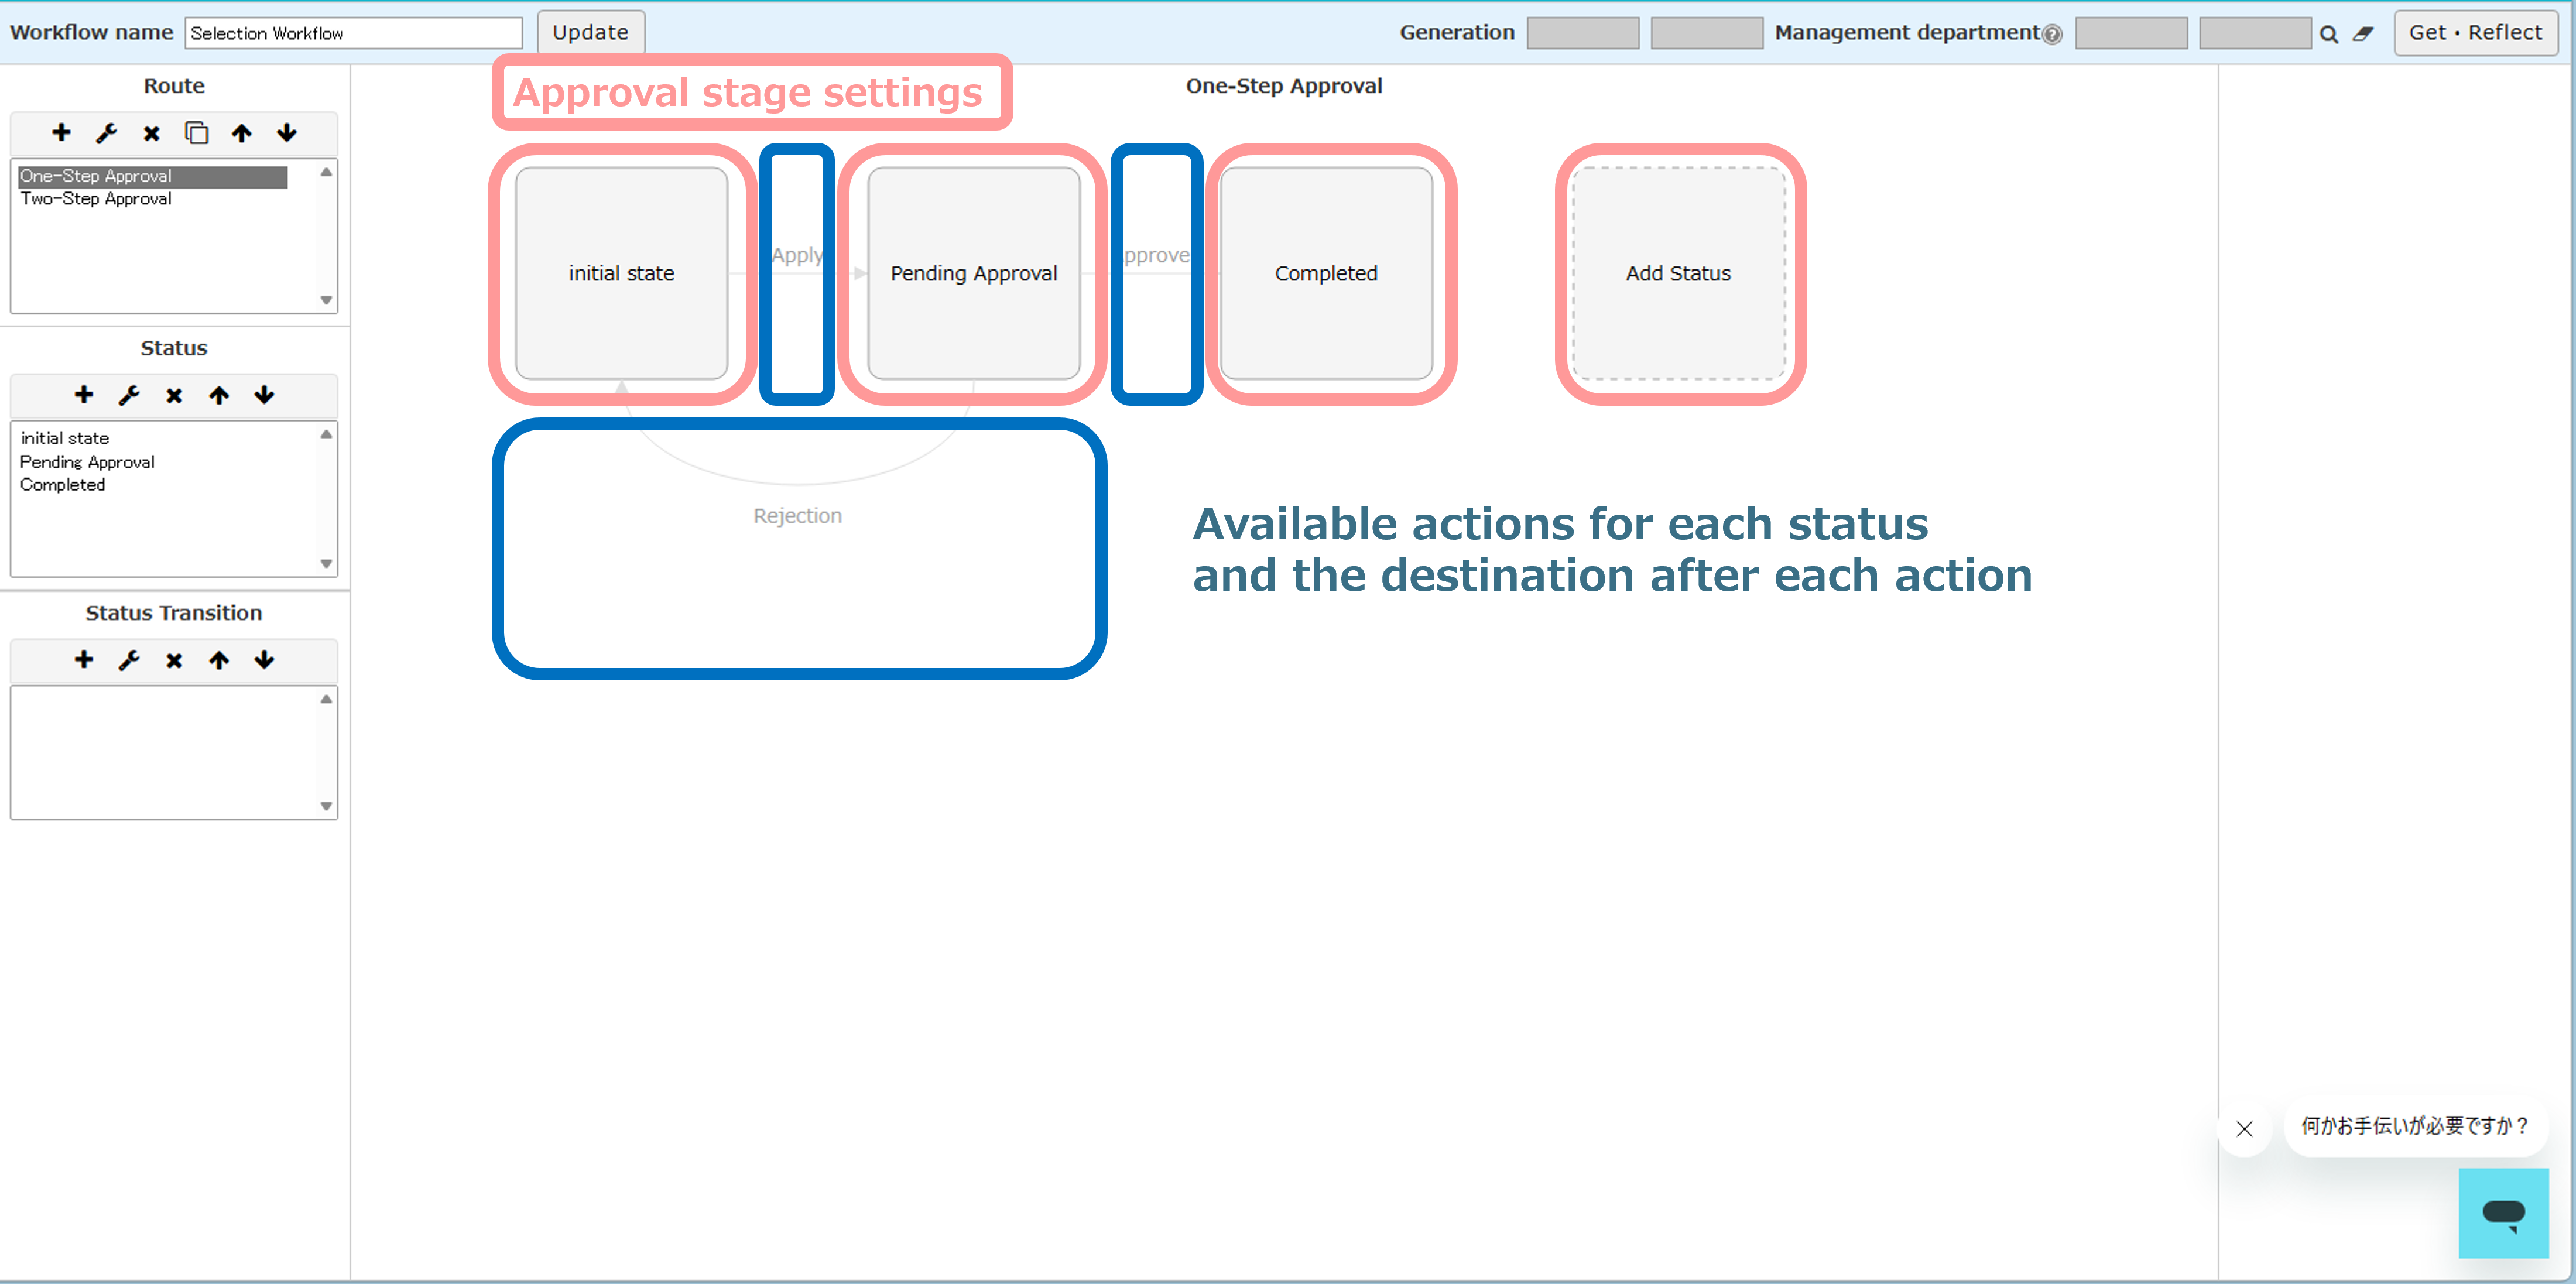
【Workflow (Approval Route) Setup Procedure】
▼Check the configuration flow (overview) in the video
This video provides an overview to help you understand the configuration points and the overall process flow. It does not include detailed step-by-step operation instructions.
Step 1. Create statuses (approval stages)
Step 2. Configure “actions available” and “destination after action (status)” for each status
Step 3. Set the “approver (person with approval authority)” and the “conditions for proceeding to the next status” for each status
<What are approval types?>
Step 4. Configure notification emails
Don’t forget to update (save) the workflow
Step 1: Create statuses (approval stages)
① Enter any name in the “Status Name” field and click the “Save” button.
<How to name statuses: How it appears on the user screen>
The status name is displayed in the “Status” column of the task list and application data list from the time the process reaches that status (approval stage) until the approval is completed. Applicants can check the status to see where the process is currently held.
The status name is also displayed in the approval history.
※It is often set as either “Manager Approval” or “Pending Manager Approval.”
▼ If the status is “Manager Approval,” it indicates that the request is waiting for the manager’s approval (in the task list).
▼ The status name is also displayed in the approval history.
② Create other statuses following the same procedure as ①.
※Be sure to create a “Completed” status (approval-completed status) without setting an approver.
💡If you cannot define rules for approvers, you can create a single status and allow the applicant to select the approver.
e.g., when the relevant department varies depending on the case.
Once the statuses have been created, configure which actions (e.g., submission, approval, rejection) will trigger transitions to other statuses.
Step 2: Configure “actions available” and “destination after action (status)” for each status
① Select “Status” and click the “→” icon.
② In “Action Type,” select the actions that can be performed in the selected status, then choose the “Destination Status” after the action and save.
Step 3: Set the “approver (person with approval authority)” and the “conditions for proceeding to the next status” for each status
① Select “Status” and click the wrench icon.
② Set the approver (person with approval authority).
💡 If you select “Department” or “Position,” all employees belonging to that category will be included.
A commonly used setting is “Department × Position.” For example, setting it as “Applicant’s Department × Section Manager” allows the system to automatically determine the appropriate employee at the time of application and grant approval authority.
③ Set the conditions for proceeding to the next status (approval type) and save.
<What is an Approver Type?>
An approver type defines how the approver (a person with approval authority) is determined when there are multiple possible approvers.
For each application, you configure both “how to determine the approver (who selects the approver)” and “the conditions for proceeding to the next status.”
There are eight types of approvers. You select the appropriate type based on the combination below:
※If you use the approver type “Select approver at the time of application,” you must also set the approver type of the initial status to “Select approver at the time of application.” If a different approver type is set, the workflow will not transition correctly.
Step 4: Configure notification emails
① Click the wrench icon for the timing at which you want to send the email.
※In the example above, a notification email is sent when the first approver performs an “approval.”
② Click the “Send Email” tab, select the recipients from the checkboxes, enter the email content, and save.
※※If you save without entering email content, only the link to the relevant application data will be sent to the selected recipients.
💡Want to insert application details into the email subject or body?💡
In the email subject or body, use the ID from the form item settings and enter it as {ID.value}.
Example (subject): {f_apply_title.value}
▼List of reserved keywords (available in notification emails for approvals/rejections)
Reserved Keyword |
Description |
| {userid} | Displays the user ID of the person who performed the action (application, approval, rejection, etc.). |
| {username} | Displays the internal (company) name of the person who performed the action (application, approval, rejection, etc.). |
| {domainid} | Displays the domain ID. |
| {comment} | Displays the comment entered when the action (application, approval, rejection, etc.) was performed. |
| {statusName} | Displays the status name of the action (application, approval, rejection, etc.). |
Don’t forget to update (save) the workflow
Before leaving the workflow settings screen, be sure to update (save) the workflow.